Dies ist eine alte Version des Dokuments!
Inhaltsverzeichnis
The Timing Module (flutter)
Overview / General information
All groundstations need to be timing synchronized. To achieve that, the timing module is used. The timing module will recieve timing data from a timesource and feed the timing bus in the groundstation. Every groundstation must only have 1 timing module but there's nothing enforce that (meaning it just will not work if two timing modules are installed). The timing module can usually also give us the position of the station (when using gps, galileo et al).
Slowtime and Fasttime
The timing information is split into three components:
- PPS (pulse per second) … informs the modules about the begin of the next second
- SLOWTIME … contains the timing information on a second base as a unix timestamp (
- FASTCLOCK … contains the high precision timing information that hint the fraction of the current second.
What a timing module contains
The timing module will in always way contain theese components:
- a timesource we call TIMESOURCE (in the current designs we use GPS)
- a microcontroller we call MICROCONTROLLER (to configure the timesource)
- a fast oscillator we call OSCILATOR to supply the fastclock output
- a 32-bit counter to count the clock ticks of the OSCILATOR
- a 40-bit serial-in-parallel-out spi register we call SLOWTIME_IN for recieving the slow timing information
- two latches, 40- and 32-bit called SLOWTIME_LATCH and FASTCLOCK_LATCH
- a 72-bit parallel-in-serial-out spi register called SLOWTIME_OUT
let me say, that the registers, latches, etc could be made entirely from discrete 74-ICs but imagining it is creepy. Thus we decided to use an FPGA here (CPLDs that contain enough registers are very expensive).
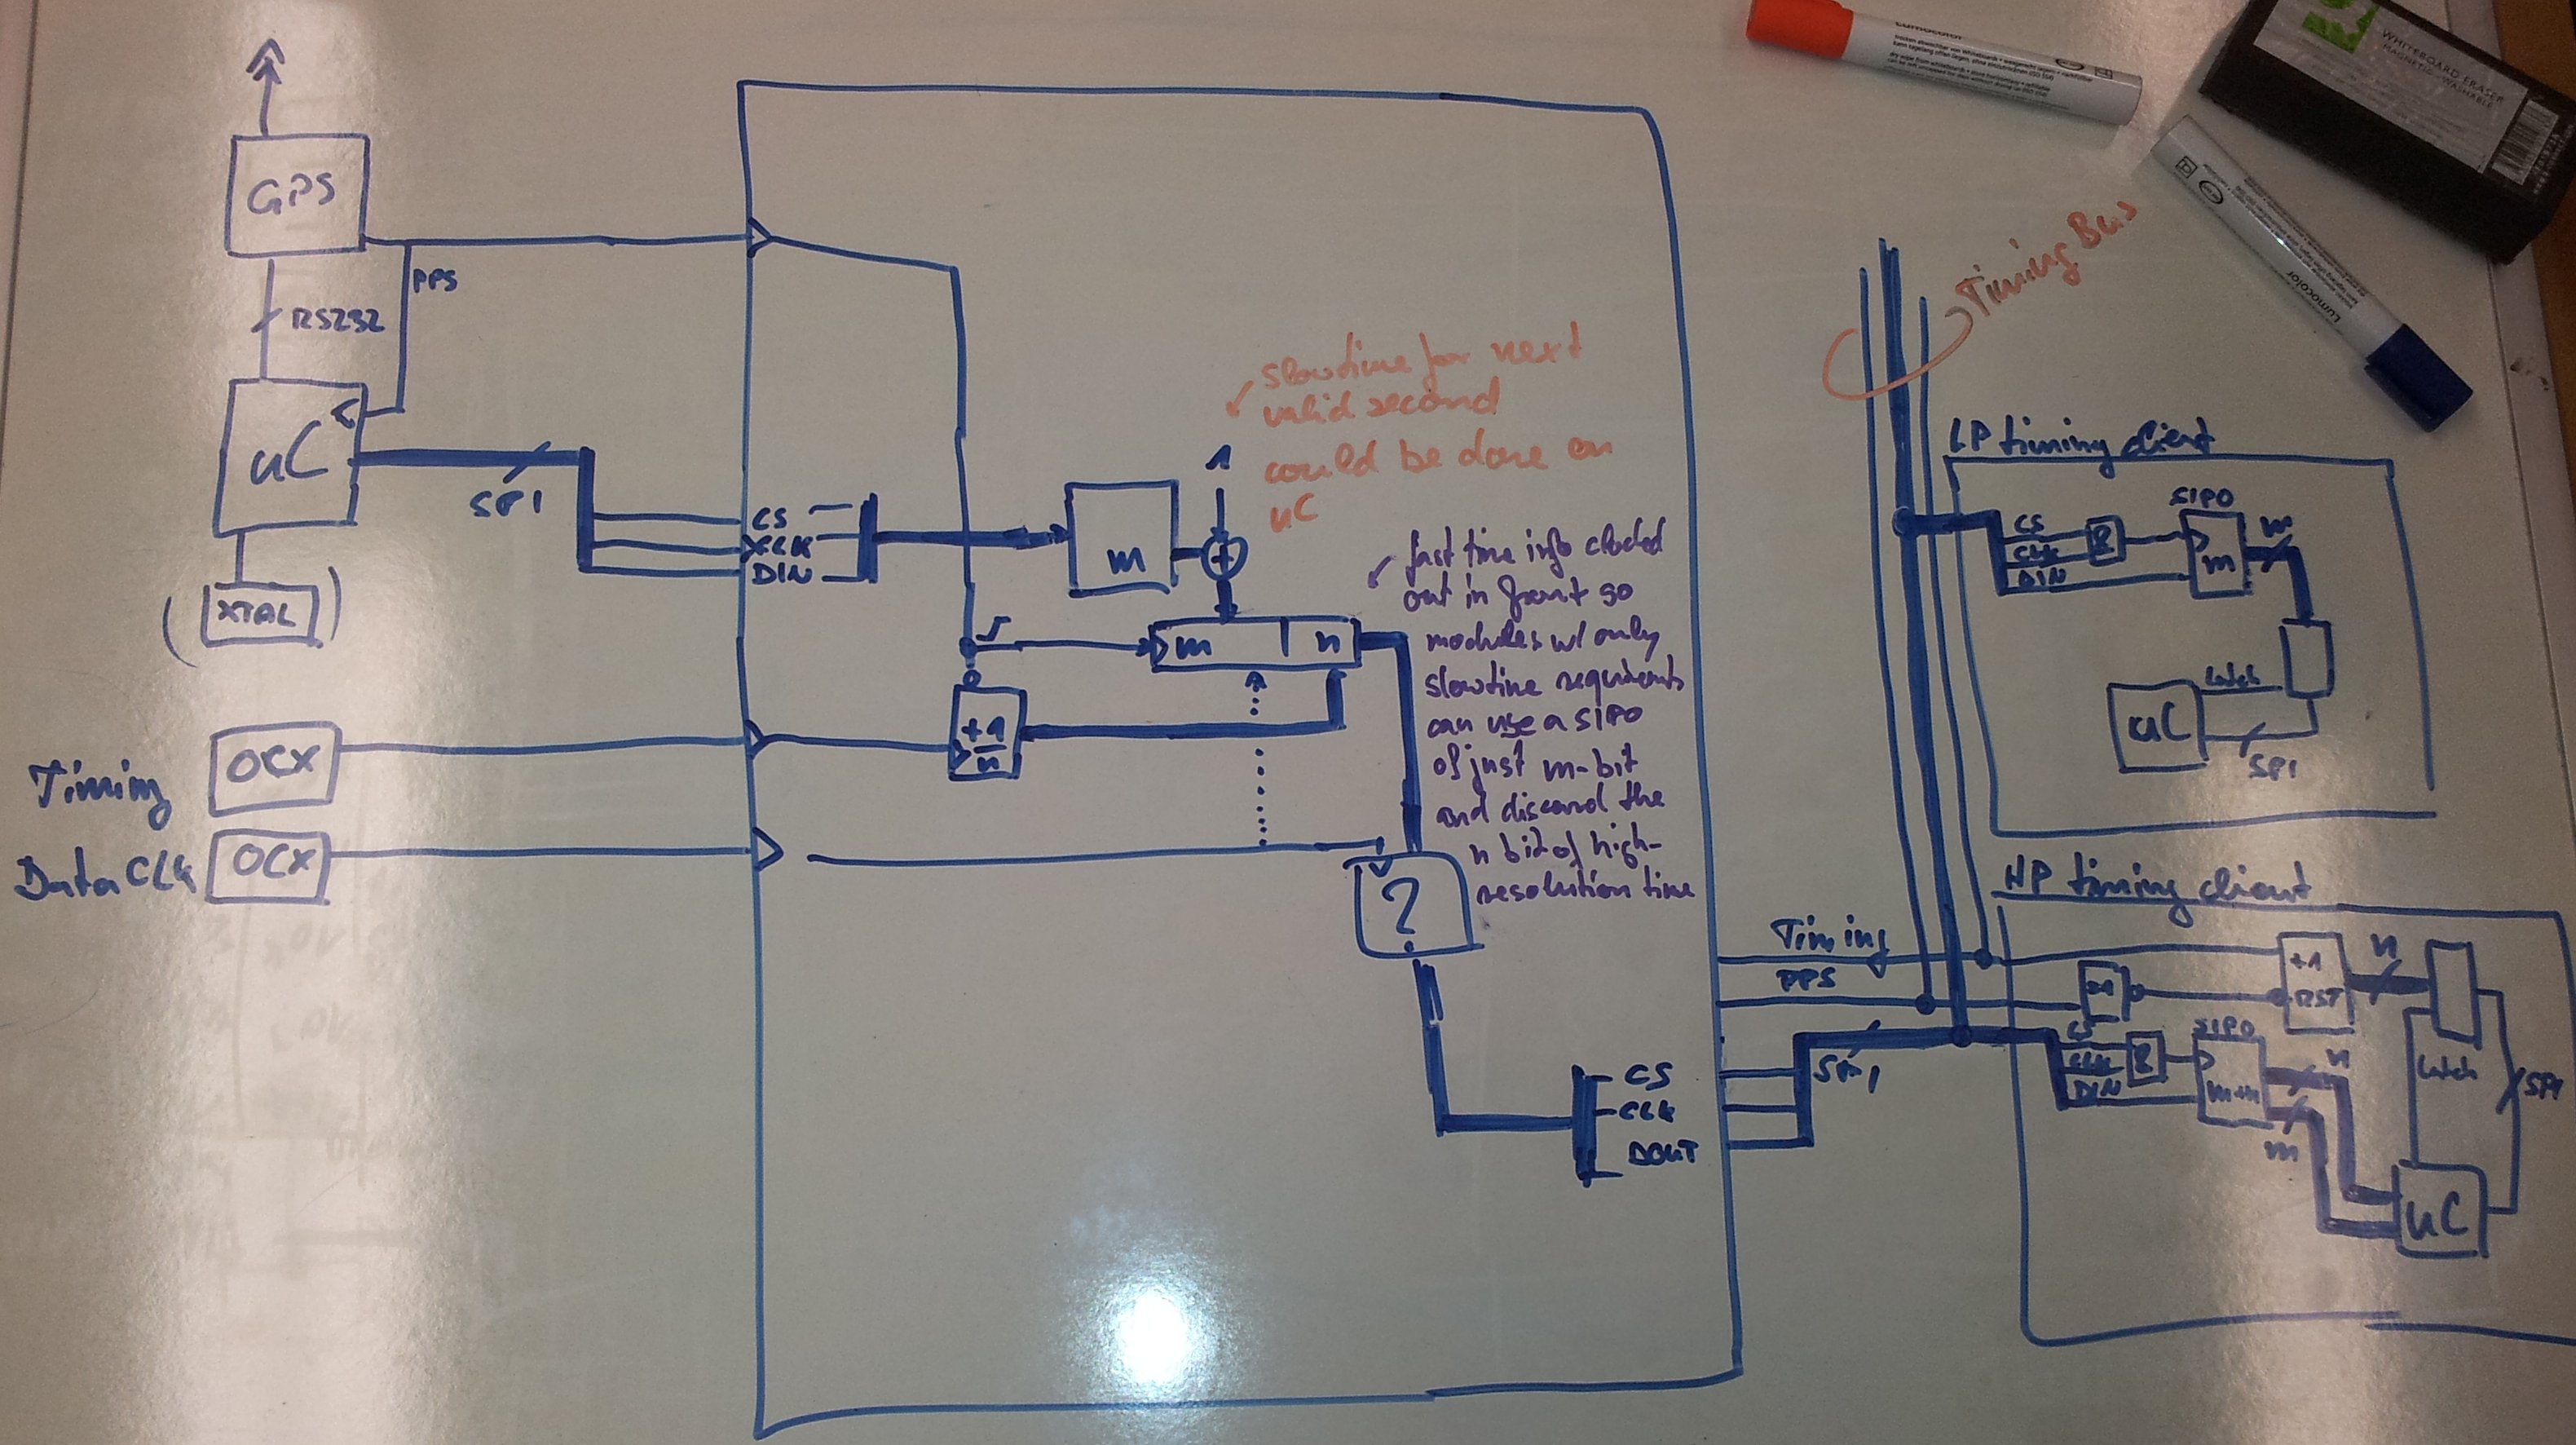
See this picture. It shows a drawn schematic of the timing bus with measurement modules and a timing module.
Examples
How a second with the timing module looks like
For the view of slowtime:
- The TIMESOURCE pps pin goes up. The counter (n in the image) is being latched into the latch register (n|m in the image) and reseted. This happens at the same time.
- The MICROCONTROLLER begins to send the slowtime information on the next second to the SLOWTIME_IN register (m in the image).
- When the SLOWTIME_IN register is filled with the slowtime, it is latched into the m part of the latch.
- SLOWTIME_LATCH and FASTCLOCK_LATCH (m|n in the image) are being latched into the SLOWTIME_OUT register (? in the image)
- SLOWTIME_OUT begins to spi the timing information on the bus
- a bit less than a second goes by
- The TIMESOURCE pps pin goes up. …
For the view of the fastclock:
The OSCILATOR generates a clock signal on the FASTCLOCK pins of the timing bus. All modules and the counter register count the number of clock cycles. After the pps pin on the TIMESOURCE goes up, the registers are cleared. The timing module stores the value at the end of the last second to measure the drifting properties of the oscilator.
For more information on the timing bus information, please see the article How the timing bus works.

